Pages

About Me

Monday, January 30, 2012

Making Kefir!


I was telling my lovely friend Lexi the other day about my adventures with Kombucha and she asked me if I like to drink Kefir. Uh...yes!! Apparently her sister-in-law had given her some Kefir grains and she had extras to give me if I wanted them! Uh, YES!!!

Kefir. is. like. magic. Of course, pretty much anything I think will take a long time and it doesn't, is like magic to me. Or anything that I can watch grow right in front of my eyes. Just you wait until I start gardening, yo!

Anyway, I brought home the Kefir grains, stuck them in a glass container with milk, put a paper towel and rubber band on top, and let it sit; shaking it every now and then. It was taking a long time the first time around, seeing as it's supposed to thicken within 24 hours and mine was still like milk at that point, so I let it sit for 48 about. It was really chunky and smelled pretty yeasty, but it's like coffee; the smell is stronger than the taste. I drank it chunks and all the first time, but I tend to enjoy it more if I blend it up. It tastes just like the stuff I used to buy at the store, except way better (dur).

Kefir grains

The store bought Kefir website boasts of 10 whole cultures and yeasts (omg, right!) but I read that this awesome stuff has about 30 or more cultures and yeasts. BAM. The more the merrier (yuk, yuk, yuk)! This is the cost of milk and fast and easy. Plus I make it myself. I could make the grossest thing in the world (which some of you probably think that kefir falls in that category (mom!)) and I would still eat it, just because I made it myself. Whatever. :)

I'm a happy camper with my Kefir, which makes up for my Kombucha taking so long.

Rachel 


Twig Luminary Tutorial

I love being surrounded by woodsy, nature inspired crafts, especially in the winter time when the mountains are full of snow and hiking is on the back burner for a short while. I found these twig candle holders on Pinterest and pinned them for a "someday" project. I saw that my friend Lexi pinned them, too, and when the ice storm here brought down a plethora of branches, we got together as soon as we could to make them.


I didn't read the tutorial until later so I didn't know that they used some kind of special adhesive for glass. Lexi and I used a glue gun and at first it the branches kept popping off, but once the glue got nice and hot, we didn't have any more issues.

I got some clear glass candle holders at the dollar store. I couldn't find any good round ones, so I got square instead, which I ended up liking a lot. 


The greenbelt behind her apartment had a ton of branches and we found some delightful red colored ones with clean bark (as opposed to the soggy, mossy ones that are so prevalent in these parts :P).
We dried them off and cut them down to the length we wanted. 


And then we started gluuuuuing!! I did mine in sections, putting the hot glue on the glass and then smooshed the branches...and my poor fingers, occasionally...into the glue.


I had some gaps between the branches...


Which I filled with smaller branches and then tied some raffiki..raffeta..rastafarria..crinkly plant tie stuff.
I always call it papery twine stuff. Whatevs.


I also found some tiny pinecones which I used on the other one I made. 


Here they are, all lit up! I love the branchy shadows they cast. 


There's something so magical about the power of hot glue. It's so wonderful for instant gratification type personalities such as myself! Lexi texted me later that night telling me that she was wandering around her house trying to find other things to hot glue. Seriously...I want to glue branches on everything now. Must gluuuuuue! 

Rachel

I linked up to


blah2beautiful


"Bass Guitar" Bleach Pen Shirt

I never in a million years thought that my boyfriend would want anything to do with my bleach pen creations. I really wanted to make him a shirt, but didn't want to ask him if I could. As soon as I sat down to make the pillowcases, he walked over and asked if I would make him one, too! Crazy. I guess he's just even cooler than I thought he was. (Not only that, but he wears it in public!) 


He found a photo of the bass he used to have and I drew this in chalk, based on the photo.


Then I slipped tin foil underneath and bleached away.


This one changed really quickly! This picture was taken about 10 minutes in and it was already turning orange. 


After I rinsed it in the shower. 


After I rinsed it and while it was still in the bathtub, I took some diluted bleach and splashed it to make the spots. It did bleed to the back, but that's kind of what I wanted to happen. 


This is another one that I made:


I forgot to take a picture when I was done before I gave it to someone, but you can kind of see the bleach splatters here. I used straight bleach and just threw it on the shirt so that it would splatter. I think it turned out really cool!


My next project will be to make one for myself...if I don't get distracted by something else. :)


Rachel 


"Sweet Dreams" Bleach Pen Pillowcase Tutorial


The first time I ever saw an example of bleach pen art, I knew I had to do it as soon as I could. I am an avid fan of tie dye and to me, this is like it's second cousin once removed. The changing of fabric, the waiting, the anticipation, and the ability to make your own design are what excites me about both!

Here are the ingredients:
Something to bleach that is 100% cotton - anything synthetic won't absorb the bleach.
Chalk - to outline your design if you don't want to do it free hand. 
Tin Foil - to put inside of what you're working on so it doesn't bleed to the other side.
Bleach pen - I used the Clorox ones and I found them at Walmart. 
A clean place to rinse off your creation - I used my shower.
A ventilated work area - I didn't pay attention to this and had a roaring headache later that night.
Rubber gloves - also didn't pay attention to this...you probably should seeing as it's bleach and you probably like your skin. ;)
A protected workplace where nothing else will accidentally get bleached - I did it on my kitchen floor.

Random tidbits:

Shake the bleach pen well and test out the first squeeze on a paper towel. This prevents a huge blob that ruins your design (or makes it better! It depends on how you look at it.)

Squeeze steadily and move in a continuous line. Starting and stopping will make your lines look blobby.

Don't make your design too detailed as the bleach does spread a bit as it sets. 

Tighter weave fabric takes longer to bleach. I left it on these pillow cases for 30 minutes the first round, and overnight the second round. A T-shirt I did only took like 10 minutes. 


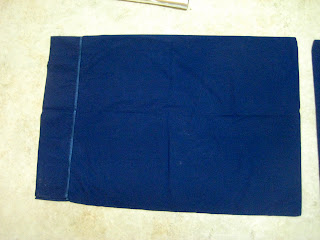
I started out with two pillowcases I found at GW for a dollar, just in case I messed it up somehow. ;)


Then I drew my design in chalk:


Then I placed the tin foil under my design and traced over it in bleach:


I freaked a bit when I saw the dark blue spread stains, but that's not where the bleach stained at all...it just must be water or something. I dunno!


You can see in the one above the dark spots around the letters I was talking about. Also, the white is the chalk, not the bleaching happening. Since this was a tightly woven fabric, the bleaching happened directly underneath where the bleach was. It didn't spread much. 

Here it is after I rinsed it in the shower and dried it in the dryer. 


It turned light blue. I thought it was boring so I drew some designs.


I left them to set over night, rinsed them out the next morning and Voila!


It was super easy and really fun to do!


Tuesday, January 24, 2012

First Try at Kombucha


I am SO excited about this! You can't even imagine! Last year I got really sick and my stomach got severely messed up. I couldn't eat anything without it throwing a fit...like a quartet of octopi in my stomach were all playing violins at the same time kind of fit. Anyway, I saw a Naturopath who gave me probiotics to take, which I consequently never remembered to take because I had to keep them in the fridge and take them between meals. Along this same time, I found G.T.'s Kombucha and drank as many as I could afford to buy (those things are pricey)! Within a few weeks, I felt better than I had in months! I swear by this stuff, but the only place to buy it around me sells it for three dollars a bottle. So I scoured Craigslist and found a lady nearby me who was giving away a SCOBY for free. I jumped on that and started brewing right away.

Here's what I needed to start brewing:

A SCOBY (A Symbiotic Culture of Bacteria and Yeast)
A little bit of Kombucha tea from the previous brew (I also got this from the lady who gave me the SCOBY) (or apple cider vinegar)
A large glass jar (it must be glass, anything else can damage the SCOBY) I use the ones with a spout on the bottom, which makes it really easy to bottle the kombucha).
8 Tea bags (either black, white, or green)
A non metal spoon (again...SCOBY's are sensitive - no metal)
Sugar
Apple Cider Vinegar
Cheesecloth
Rubberband


Flower Pot Earring Holder

I've always had problems displaying my jewelry out in the open. I've found that if I can't see it, I don't wear it and if I don't wear it, I only wear one pair of earrings for weeks on end, and that's booooring.

I've seen options like this on Pinterest:


Which I still think is super cute and I might do it some day, but I don't have the supplies for it right now but I do have flowerpots! I used to have African Violets in them before they just up and died on me. Since then, I've had four cute, bright, little flower pots with nothing in them.

So, this is what I did with them!


I like this one with the earrings the best, because I can just rotate it to see all of my options and I can keep studs in the base. 


This one is nice so that my brushes don't have to clutter up my drawer and dump powder residue all over the rest of the things in my drawer.


I thought this was the best. I don't like laying my toothbrush on the counter and it matches the rest! I just filled it full of glass marbles and rinse them every so often.  


Matchy-matchy, fun, colorful, and effective! 

I apologize for my awful photography... my camera is on its last legs and I'm still saving up for a DSLR. :)

Rachel 

UPDATE: I've since made this...


Pinterest Challenge: Pretty Necklace Board

I've never known what to do with my long necklaces aside from thumbtacking them to a wall, which is most certainly not pretty. When I saw this idea, I couldn't believe that I hadn't thought of it myself! This one is just to die for, I love the frame!


Source: etsy.com via Rachel on Pinterest


I'm currently on a tight budget and had to do with an absolutely awful bulletin board from Goodwill. I really should take before pictures of the things I find there. This was a regular bulletin board with white trim and the cork was painted a pale pink. Blech. Not that it mattered, since I painted it anyway. :)

This is mine:


Not as exciting as the one from Etsy, but just as functional!

Wood burning

In the summer of 2010 I worked at the YMCA of the Rockies in Granby, Colorado. They had THE most amazing craft shop there and I spent every free moment down there that I could. One of my favorite things to do there (among tie dye, mosaics, leather working, ceramics, and beading) was wood burning.
You use a little pyrography tool with different tips and burn your heart away. Well...wood, not your heart. You get my point. I was SO excited to find the exact same wood burner at an art store in West Seattle for super cheap (you can get them at Walmart for ten bucks, too). I went to town this Christmas and made a plaque for everyone in my family. Of course I gave them all away before I took pictures of them, except for Sean's, which is the one I'm showing you today.


I printed off the cross image from the interwebs and typed up the words on my computer and printed them out. Then I did the age old "reverse rub" thing where you rub the back of the paper with a pencil and then trace over the image onto the wood.

The biggest challenge I have with wood burning is the size of the grain and the hardness of the wood. If the grain is too defined it can cause the tip to bounce and it creates kind of a bleeding effect. Also, if the wood is a hardwood you need a pyrography tool with an adjustable temperature (which I don't have, so I just choose soft woods.)

It takes a lot of patience but it is so fun! I finally branched out enough to do a free hand mountain landscape for my dad, which was a lot more rewarding than just tracing someone else's image.

Rachel

Pinterest Challenge: DIY Whiteboard

I saw this idea a few years ago and have always wanted to try it. I saw this particular one floating around Pinterest and finally decided to do it!


I went to Goodwill and found an absolutely awful photo in a great frame (not that hard at Goodwill...) and  bought a fabric remnant at Walmart. You have to choose a fabric that isn't too bold or dark so that it won't conflict with the marker you'll be using. I didn't look too closely at the frame I chose and I accidentally bought one that was professionally framed [read: a pain in the butt!] so it won't be as easy as I would have liked to change out the fabric. Oh well! :)

Here's my version!


I think it turned out pretty cute. 


Seattle Snowpocalypse 2012


I know that people from the "snow hardy" states laugh at us Seattleits when we freak out over two inches of snow but hey now, we have ice! Hills! People who don't know how to put chains on! People who can't use roundabouts AND can't drive on ice!!!

That being said, I was disappointed when the "Snowpocalypse" they predicted brought a few inches of snow that melted off by noon. I like the drama of snow! Schools close, people stock up on nothing but bananas at the supermarket (I kid you not, I just wanted my dang bananas), the world shuts down temporarily at the mercy of the weather. I LOVE it. The weather was on my side this year because two mornings later I woke up to this.


Beauty...drama...ICE. Trees bowed down to the earth under the weight of their burden and snapped when it became too much, people lost power, and our parking lot turned into an ice rink. I'm not happy that people lost power (some people are still out even a week later!) but I did like having our friends stay over when they lost theirs. I'm not a person who finds happiness at other people's expense...I just love the drama of weather and how people can't do a darn thing about it. Speaking of, my car was completely encased in ice. It was like nothing I had ever seen before.


Here's my Coloradan boyfriend digging my car out. I helped..after I put the camera down. :)

The ice showed up better on our neighbor's car, so I snapped a picture. 


Crazy!


This is one of the many reasons why I love Seattle so very much. We get a week of drama and then everything goes back to normal. 

Rachel 

Tuesday, January 10, 2012

Tea and Yogurt Face Mask

While researching DIY lotions I read that caffeine can tighten up the bags under your eyes, probiotics can restore the balance of healthy bacteria to your skin, ironing out the extremes of dry and oily skin as well as combination skin, and olive oil is an effective moisturizer. I decided to mix all three of these together and see what the result would be!

Here are the measurements I used:

Two tablespoons of plain yogurt (this is for the probiotics)
One tablespoon of olive oil 
The steeped, loose leaves of two black teabags 

I mixed them together and spread it across my freshly washed face. Other than looking like I had tripped head long into a dirty diaper, it was great. I left it on for maybe about 5-7 minutes until it started to dry out and flake off (I think I will use honey next time to make it stick better) and then rinsed it off with warm water.

My skin felt tighter (but not in the dry skin sort of way), was soft to the touch and the bags under my eyes were reduced a bit. Not only that but the tea gave my pale skin a slight healthy glow, which is much appreciated in Seattle in the winter. ;) I feel that a continued use of this may result in skin that is softer, visibly brighter and tighter, and hopefully I will see less of an extreme between the dryness and oiliness of my skin at different times of day.


Next time I think I might add some sugar and honey. One for an exfoliant and the other to make the mixture stick to my face better.

(And no, I have no shame. :P)

Rachel